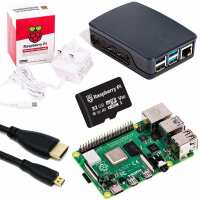
“The Raspberry Pi 3 Media Centre works ok with the Kodi media program.
Draw backs are the heat generated with a USB drive attached and while playing a file the mouse response is sluggish.
This application is at the limits of this equipment.”
“Pleased with this buy. Good choice for someone with no experience. It all worked nicely and after a bit of googling I’ve got printing and backup sorted.”
“Easy way to get all parts in one go, I added a heat sink on the processor.
Very easy to put together. Plenty of help online to explore further.
And a lot of performance in a very compact and cheap unit.”
“All included and easy to assembly. Mine RPi3 end up as a SecureDNS server, TOR proxy, OpenVPN server, secure WiFi AP and advert blocker. I love it :)”
“I needed a NAS server quickly. My trusty old Dell D810, to which I had attached two WD 2TB USB drives decided to die on me - power failure. And so, I removed the old Samsung SATA drive from the Dell D810, and slotted it into a USB caddy which I sourced on eBay for c£6. Then I ordered a PiHut starter kit. First thing to do was to copy the NOOBS from the SD card onto a drive just in case I needed it later (I didn't). Then I downloaded OMV and etcher and burned OMV on to the SD card with etcher. I slotted the SD card into the Raspberry Pi and fired up as per the instructions I found on t'internet, of which there are many. It was up and running in under half an hour. I set up OpenSSH so that I could assign root user privileges and run the Pi headless (plugged into the ethernet LAN but without a screen, keyboard or mouse). After power-cycling the device with first one, then the second WD 2TB and finally the Samsung drives, the NAS was ready to use. I had to wait while OMV set up the ext4 journal files for each of the WD 2TB drives - about 10-15 minutes for each. Later I transferred my data from the Samsung on to one of the WD 2TB drives. I reformatted the Samsung to NTFS so that it works as a different NAS attached to my BT Homehub 5!
All in all, a pain free upgrade; much easier than my dear old Netgear NSLU2 ... remember them? The Raspberry Pi really is a great bit of gear. It would be totally good as a NAS if it incorporated WOL out of the box. I read elsewhere that I can effect this with some small hardware tweaking.”