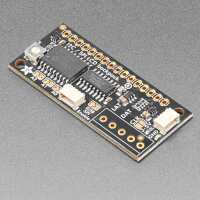
“Screen worked for about 5 minutes then the I2C backpack failed blowing out the LCD. I checked my wiring several times over, and it was correct. This makes me feel it was a dodgy screen or backpack.
This being said, the 5 minutes it was alive it was clearee than most I have seen”
“These Adafruit i2c/ SPI LCD backpacks are great and this is a second one I have had in a few months. They have the right level of backlit control, and wouldn't hesitate to recommend.”
“Handy upgrade to an existing lcd display, straight forward soldering job. Easy to program in Arduino, had to load circuitpython for raspberry pi which took a few minutes longer. Overall very satisfied.”
“I added the backpack to my project because I wanted to tidy up the number of wire connections, and free-up a few GPIO pins.
I connected the combined LCD/backpack assembly to my i2C highway using a short 4 way ribbon cable from RS. The product code is 684-2308 (a pack of five lengths, each about 4" long).
You'll need a python driver from this: get it from https://github.com/dbrgn/RPLCD
There's quite a lot of documentation here which is very useful.
Load the RPLCD directory to your Pi and you can then import this into your project with the command
from RPLCD.RPLCD.i2C import CharLCD
(You can do a direct import using pip if you read the documentation).
You'll need to declare your lcd with a command such as
lcd=CharLCD('MCP23008',x20)
(Both strings in quotes will depend on your installation. The long number is the chip that's been used to build your backpack; the hex number is the i2C address for the backpack. (You can change the settings by straps on the backpack, so you can have more than one LCD).
Finally: if you've had your LCD working before you'll find some of the commands you've used no longer work. The changes are quite simple and actually make for more understandable code. Cursor control is easier, and turning the LCD on and off has changed.
Best of luck!”