“The case is good in-principle but flawed in a number of areas SSD access which is being solved, WiFi signal strength is attenuated for the 2.4GHz band, 5GHz is just about ok. It’s a metal case and all metals are conductors! Also fan cooling uses a serial port USB0 but plug in a USB device and the fan stops working, they should have used the RPi GPIO14 scheme rather being too clever!
When the new pcb is produced it will be a good case and I’ll buy one. PiHut service for my return was second to none which’s why I buy from them, they can be trusted and offer excellent customer service and that’s worth a lot for me.”
“I'm an old dog learning new tricks. I have built a pi computer using a pi4 8gb with Deskpi Pro, a 240gb ssd. Well pleased with the performance the cpu is kept below 55deg. Very stable, and the grandchildren love it.”
“I found it fairly tricky to build, even though I have built many projects before. For example the ICE tower was difficult to fit, and required the supporting clips to be bent to allow the short screws to engage. Some other tolerances were quite tight.
The main drawback (mentioned in the product description NOW, although I don't think it was when I bought it) is that the ssd driver doesn't support uasp mode (or SSD trim), and this means that the speed of the drive is reduced to about half of what it is capable of as it has to use usb-storage mode. My solution, with which I am quite happy, was to use an existing boxed crucial CT500MX drive. I used this with an existing Eletung USB 3.0 SATA adapter, and mounted it on the outside of the case. (I have a photo but not sure how to include it here). This works very well, giving nearly twice the transfer speed of connecting the drive using the supplied (non uasp compliant) driver board.
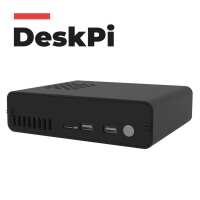
Otherwise I am pleased with the case. It is rugged, and it is a bonus to gain the two extra USB ports on the front (which are activated by installing the DeskPi software). The power button also works well, but remember that holding the button in gives a forced shutdown, which should be only used in emergency. Normally you should shutdown using the GUI shutdown method. I have also tested the IR setup with an existing controller and it works fine.
Overall I am fairly pleased with the end result, and it works well with the mods I have made to the drive. 3.5 stars out of 5”
“This is a great case for the rPi. It includes active (fan) cooling, a power on/off button and provision for an (optional) internal 2.5” solid-state drive. All the hardware interfaces (HDMI, USB, GPIO etc) are at the rear, making it very neat. The front (and rear) panels are dark-smoked acrylic which means its very easy and neat to mount LEDs etc behind the panel, so they can be seen though the panel without cluttering it. It was a bit fiddly to assemble but the end result is a neat, well-designed product.”
“Its a great case for the Pi 4 with good build quality. It was shipped with the original version of the DeskPi and a replacement PCB, but the instructions were poor for what to do with the PCB, but I swapped it out of the case and all works well. Only other thing I've noticed is the automatic fan control service keeps stopping working, but that's a software issue as its a service on the OS.”
“I’m really pleased with the case. It looks really good and feels solid. The main aluminium body gives it a real feel of quality.
I did face a few challenges during assembly. Perhaps I’m not a ‘maker’ after all. I thought I might share some thoughts that may help other avoid the difficulties I had.
At step 3 in the instructions you are told to fit the GPIO Adaptor Board. I would suggest you wait until step 4 to do this – once you have fitted the GPIO ribbon cable into the GPIO Adaptor Board.
At step 4 I would recommend removing the top (SSD) board of the (replacement) unit. This will make it easier to line up the mic, HDMI and power connectors. It also makes connecting the fan and SD card ribbon cable easier. Just be careful to line up the 4 pin connector on the two boards when you put it back together. This also helped because the SD card ribbon cable had come free from the connector on the power board.
Don’t forget to remove the M.2 expansion board from the old (original) SSD board, before you dispose of it, as you may want to keep this for future changes especially if you are using a 2.5 inch drive.
Apart from that I really struggles to fit the cooler to the Pi board because the screws are short and the cooler brackets bend out of alignment to ensure a tight fit. I’m also puzzled about the difference between the M2.5*5+3 and M2.5*4+4 pillars. I also managed to pull out the retaining bar on the GPIO adaptor and had fun getting it back in!
After all that I had some sense of achievement at having finished it.”