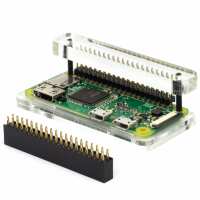
GPIO Hammer Header (Solderless) Male + Female + Installation Jig Reviews

4.6 Rating 185 Reviews
Read Pimoroni Ltd Reviews

About Pimoroni Ltd:

The ultimate Maker store — a curated range of the best of breed Maker products. Worldwide delivery. Personal support.

Visit Product Page
Simon Chester
Verified Reviewer
Great option for anyone not too confident with a soldering iron. But do note that you need to place it on a hard surface for it to work properly. I put mine on a solid table, but put a beer coaster underneath to prevent damage to the table. Turns out even the padding from the beer coaster prevented the pins from going through (no matter how hard I whacked em). I had to place it directly on the hard surface before they would go through all the way.
Helpful Report
Posted 1 year ago
Adrian Scarle
Verified Reviewer
I ordered a Keybow and remembered that my 1st gen Pi Zero didn’t have the GPIO pins. Since I can’t solder for toffee this was a very useful solution. Perfectly designed, a couple of taps on the jig with my pin hammer securely fixed the male header in place.
Helpful Report
Posted 1 year ago
I have bought some amount of 'labour-saving' tat down the years, so consider myself something of an expert in this field. I am also a very big fan of the BFI (Brute Force & Ignorance) approach to electronics So after hammering in my pins and finding my pi zero no longer worked, I applied some more BFI (when the only tool you have is a hammer... right?) It turns out that this is less than optimal Now i have a very very dead pi zero 2
Helpful Report
Posted 1 year ago
Sorry to hear that it didn't go well :( If you have time to send over the details of what went wrong to support@pimoroni.com so we can see if there's anything we can improve either with the kit or the instructions that would be much appreciated.
Posted 1 year ago
BIANCAMANO MAURIZIO
Verified Reviewer
Perfect
Helpful Report
Posted 1 year ago
Arus Beloved
Verified Reviewer
Not being the best with soldering and didn’t want to destroy the Zero 2W, the solderless jig and male header worked a treat Don’t see why this is not a more standard approach so 10/10
Helpful Report
Posted 1 year ago
Surendra Nath
Verified Reviewer
Ingenious tool!!! Especially for those of us who are not good at soldering.
Helpful Report
Posted 1 year ago
Everything was in order, although one could imagine a small note of instructions or tips included. How far the pins need to be run through and that sort of thing. Of course, all such information is fairly easily obtained on the internet. It was a lot easier than soldering, I can tell you that much.
Helpful Report
Posted 1 year ago
Like most people I suppose, I used this hammer header to add a male header to Raspberry Pi Zero 2 W. Specifically this Pi went into a Piboy DMG handheld. I placed a cutting board on top on my desk with silicone padding between the cutting board and desk to prevent damage. Then I set up the installation jig according to the instructions, got out my rubber tipped hammer, and smacked the header into place. It made me a touch nervous, but worked great. The header is working perfectly, and the Pi is installed in the handheld. Now that I own the jig, I can order hammer headers bare in the future. I don't recommend trying to install the male header without the kit. I tried to install one previously by putting a cable on it and smacking the cable, and it was a fail. Overall 5 stars. Worked great, and easier than soldering for someone that doesn't solder much.
Helpful Report
Posted 1 year ago